12 Mar 2016

Fly away Journals


Two more beautiful handmade  Journals have found there way onto Folksy and straight out of the door again... I have to say I am a very happy lady.Each one is made with detail and love of the original something different each time, they still have vintage linens and felts inside for you to record your stitched and have by your side to reference..I am going to be working on more of these with an idea for something a little different on the next, well if it works that is, also some beautiful needle cases too.


Lovely embroidery with my little bird by roses and a striking blue velvet ribbon


The perfect little poem on the back.


Dark Linen Journal with pretty vintage lace boarder of flowers.


Sliver scroll woven button and green velvet ribbon 


Stitch  a Tiny Stitch and make a Huge Impression 


Mell's


16 Feb 2016

Keep your stitches

 I have made a new stitch journal which I am pleased to say sold two hours after listing along with another one..... I thoroughly  enjoyed making it and will be starting on the next one this evening.
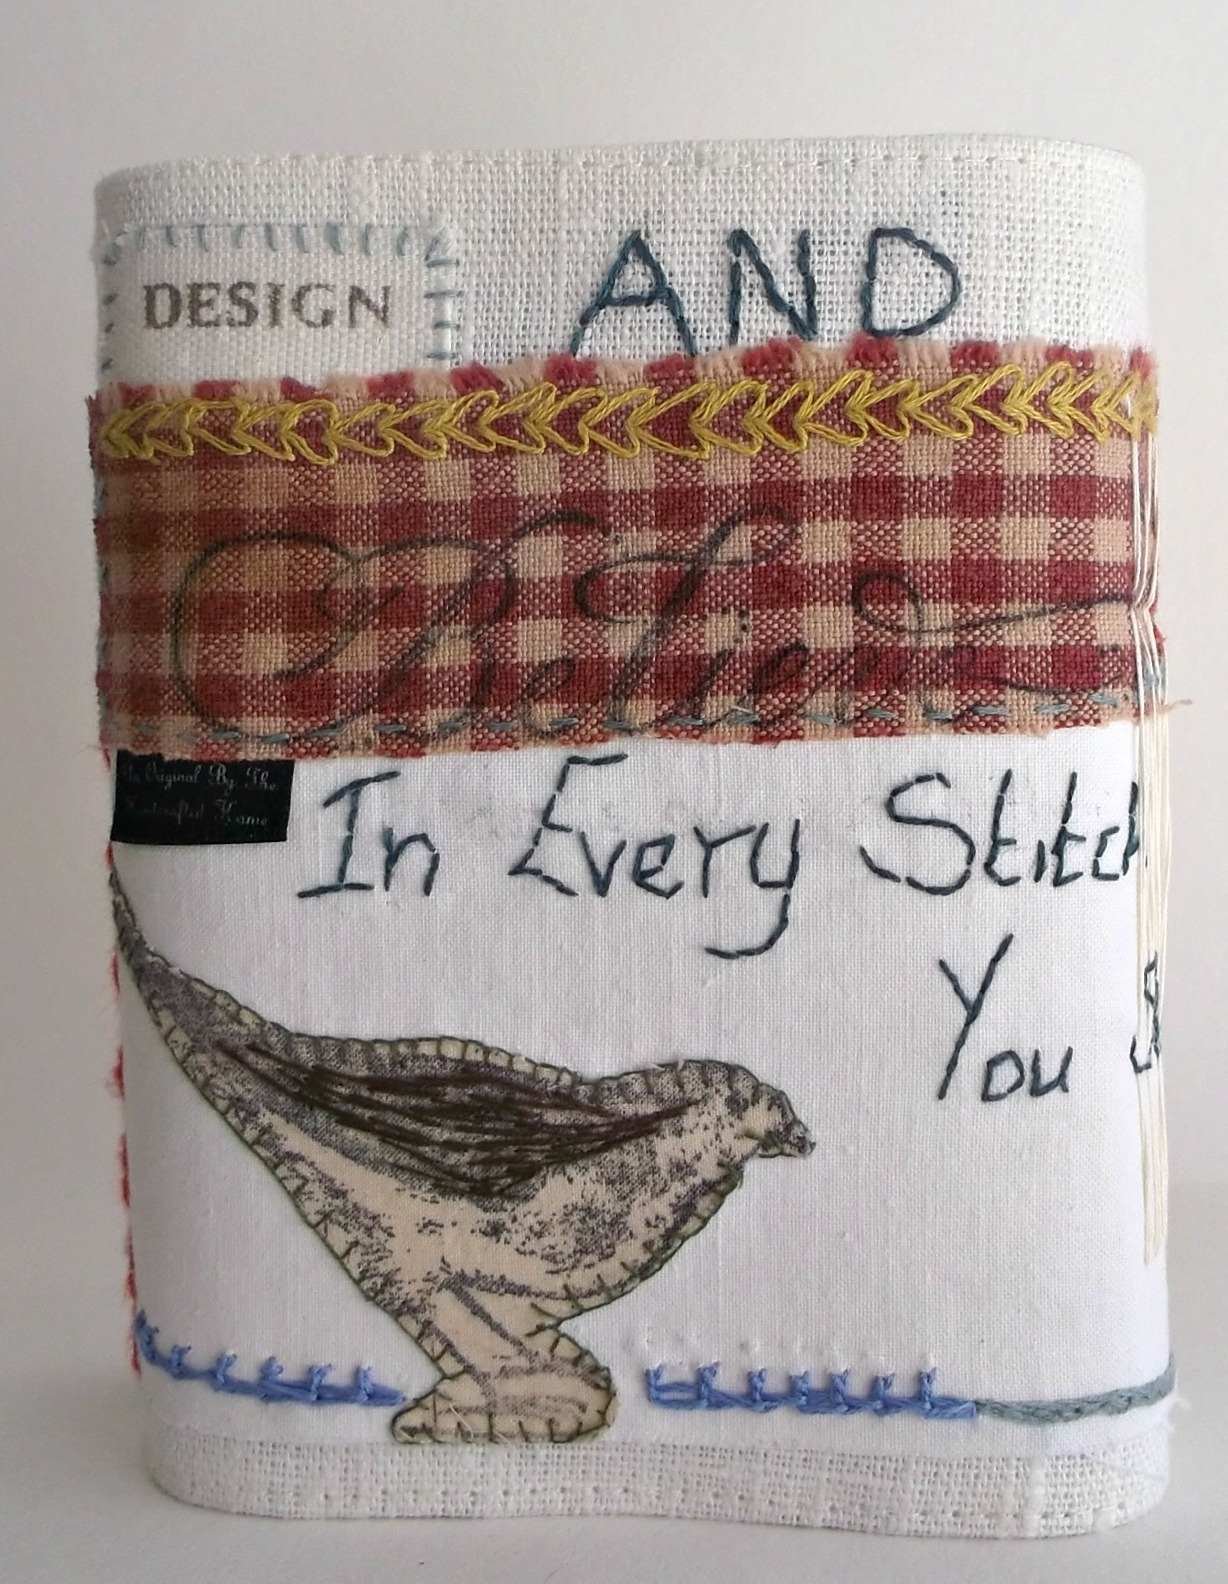
This one was one of my best in my opinion  it is made from Linen and dressed with applique and vintage lace " Design and believe in every stitch you stitch"  are the words on this along with some different stitches to finish.


Design and believe in every stitch you stitch   


 All of the pages are paper and fabric including Linen - felt - tea stained linen and fine linen


          A lovely crochet flower sits on the front with two small embroidered ones               over a bed of lace.


                       Three simple hook and eyes to close.

                                                                       Mell's   Now Sold

9 Feb 2016

Dandelion Flight


I love Dandelion's which comes from picking them for my mum for wine making as a child.
For me the way the beautiful flower folds back in on its self and dies to be re born as a beautiful fluffy seed head is just amazing.
Here is a celebration of the seed head, a 16 x 16 " cushion machine and hand embroided with crewel wool to show the flight of the seed. The fabric is olive green linen which on the inside is lined with sateen to the back of the embroider. The back of the cushion has a beautiful Art Gallery fabric with a lovely curl pattern which compliments the front perfectly.
The piped edge brings the back to the front just to finish it off and a hidden zip to the bottom encloses a feather pad cushion .

To Purchase use my folksy Link to shop on the right  thanks Mell's


12 Sept 2014

Yin Yang & Bling Progress

New Embroidery Design "Yin Yang & Bling"


I have been playing around with my embroidery in the pursuit of practice makes perfect, I wanted to design something myself and I love the Paisley pattern a lot. I started by drawing the pattern and trying to decide how the inside and outside should be decorated, bearing in mind I wanted to use some special threads too.   I have not done lots of gold and silver work just a few kits that have been purchased over the years, but when I have done its really lovely to work with. Anyway going back to the design, I didn't want anything to complicated to start with so playing around drew circles and decided to go with them.  In most of my other textile works I never plan or intentionally plan a project most of the time I just do something and if it works out I then draw plans ! it's just the way i work. After drawing the first paisley pattern i did another and laid them together and saw Yin and Yang! and this instantly gave me an idea to use it as that with the added bling, there will be another little feature at the end but I am not saying anything about that yet incase it don't work out.


                                                                Looks a little like Aero bubbles 


 Next it was time to transfer  the drawing to the cloth.  I chose red transfer  pencil as this fades nicely after a while too. The  threads are from Mulberry Silks, beautiful  medium and fine ones and I could not wait to  use them.                


 I outlined with split stitch as usual and began stitching.


I did not choose the gold threads until I had started stitching and had looked up some different ones and there uses. I have just ordered a new book too to help me understand the gold threads hers the link http://www.searchpress.com/book/9781844486267/goldwork-techniques-projects-pure-inspiration and how to use them . I did visit http://www.handembroidery.com/ too a while back and had the pleasure of watching the experts at work. Well its all coming along nicely and below are a few pictures to see how.
Join me again when its finished x
Mell's ♥


13 Jul 2014

Stitch School Lazy Daisy & French Knot

Please remember I have been stitching since age 11 and know basic rules so this is just my own knowledge shared with you all and I hope it will help you onto a stitching journey that lasts. 

Hi There our stitches today are Lazy Daisy and the French Knot, the daisy is a quick flower to master and you can decorate a large area with them and just add stems... The French Knot is good for flower centers and filling to.. Tree branches, flower heads.
For now you can read my satin stitch tutorial for the set up of your hoop, later I will add a new tutorial on the set up and ways of transferring your image to cloth.


Now you have prepared you hoop you need to separate your threads. Holding you six strands please pull them all apart one by one by pulling in an up direction.  Please do not try and split them like a banana.
I have used three strands of cotton for this demonstration and an Embroidery needle.


Lazy Daisy Stitch


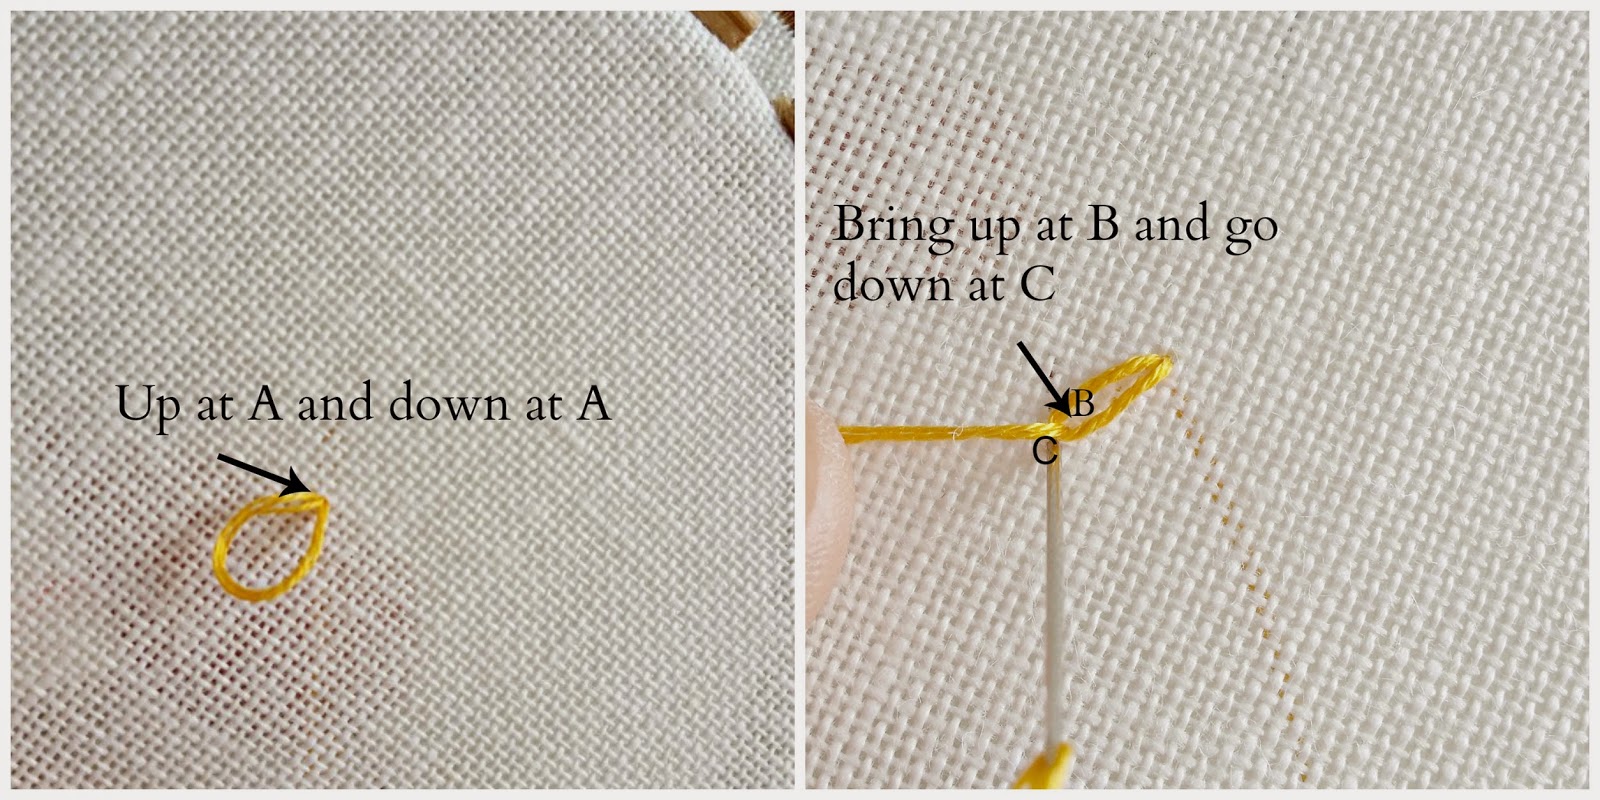
Put your needle up through the cloth and take it back down at the same point. Bring it up again at B which is inside the flower loop and take it down at C just outside but close as possible to the flower head.
Your first petal.


If you want to you can do the stitch in one monition by going in and out of the cloth and loop
the cotton around the top of the needle, then take the needle down to make the stitch over 
the head of the loop.


Try and keep your flower loops the same size although this will come with practise. 


Mell's ♥


French Knot 


To do the french knot use your Milliners Straw needle again like the bullion Knot it will make it so much easier for the thread to glide down the needle and make the stitch.
Bring your thread up and holding it with your  left hand ( right if left handed) wrap you needle with the cotton.
Again the size of the knot will depend on the amount of strands you  use to form the knot and how many times you wrap the needle.  This is where you can experiment and practice a little. Here I have used all six strands here and wrapped three times.


Once you have wrapped the needle take it back down again where you came up like the lazy daisy stitch.
As you pull the thread from underneath place your thumb on the knot so it keeps its shape and you are left with a little pretty knot to use as you please in your designs. 


Happy Stitching Mell's ♥


Stitch School Bullion Knot

The Bullion Knot & Bullion Loop

You will need a hoop and fabric I have used a 28 count linen for this. Its always best and rule of thumb to have you hoop bound around the bottom with tape to protect your work. You should lay tissue paper over the inside edge to protect your work at the top but for this I will not . Remember to pull all six strands of cotton apart and put back together the amount you want to use, this will help them to lay straight.

The best needle to use for a bullion knot is a  Milliners Straw needle as it is the same size from top to bottom. This means you thread will glide down smoothly. The size knot that you will make will be determined by the amount of stranded cotton you use for thickness also by length of you stitch. (where you come up and go down to begin). I used two strands of thread here.

Milliners Straw's


Lay your fabric in the hoop and pull and tighten the hoop until it makes a drum sound , you are ready to stitch.  Bring the needle up at A now go down at B. This is the point where the length of this stitch will be the length of the bullion knot.. On making the next stitch do not take the needle out of the fabric all of the way, just put the head of the needle out at  C. 
Now wrap the head of the needle with the stranded cotton but keep it in the fabric, you can move the needle along bit by bit. I have wrapped the thread around here 8 times.


Now you have wrapped your thread hold down the knot lightly and gently pull the needle all the way through easing your thread over it and as it comes through at the end gently pull all the way through.


Your first Bullion Knot


A Larger Knot in Blue with Six strands of thread.

I have left a bigger distance between A and B this time.


I have used six strands of cotton and wrapped it 14 times.


THE FINISHED KNOT


BULLION LOOPS


THE BULLION LOOP IS MADE IN THE SAME WAY AS THE KNOT BUT THE DISTANCE BETWEEN IS SMALL AND THE AMOUNT YOU WRAP WILL MAKE THE LOOP. 


THIS HAS BEEN WRAPPED 35 TIMES


FOLDED OVER AND THE NEEDLE PASSED BACK DOWN THROUGH THE CLOTH


THE BULLION LOOP CAN BE USED TO MAKE FLOWER PETALS,  EDGING AND LOTS MORE


THANK YOU FOR TAKING THE TIME TO STITCH WITH ME I DO HOPE THIS WILL HELP .
IF YOU HAVE ANY QUESTION PLEASE ASK.
MELL'S ♥